Video streaming in QGroundControl
This page shows how to set up a a companion computer (Odroid C1) with a camera (Logitech C920) such that the video stream is transferred via the Odroid C1 to a network computer and displayed in the application QGroundControl that runs on this computer.
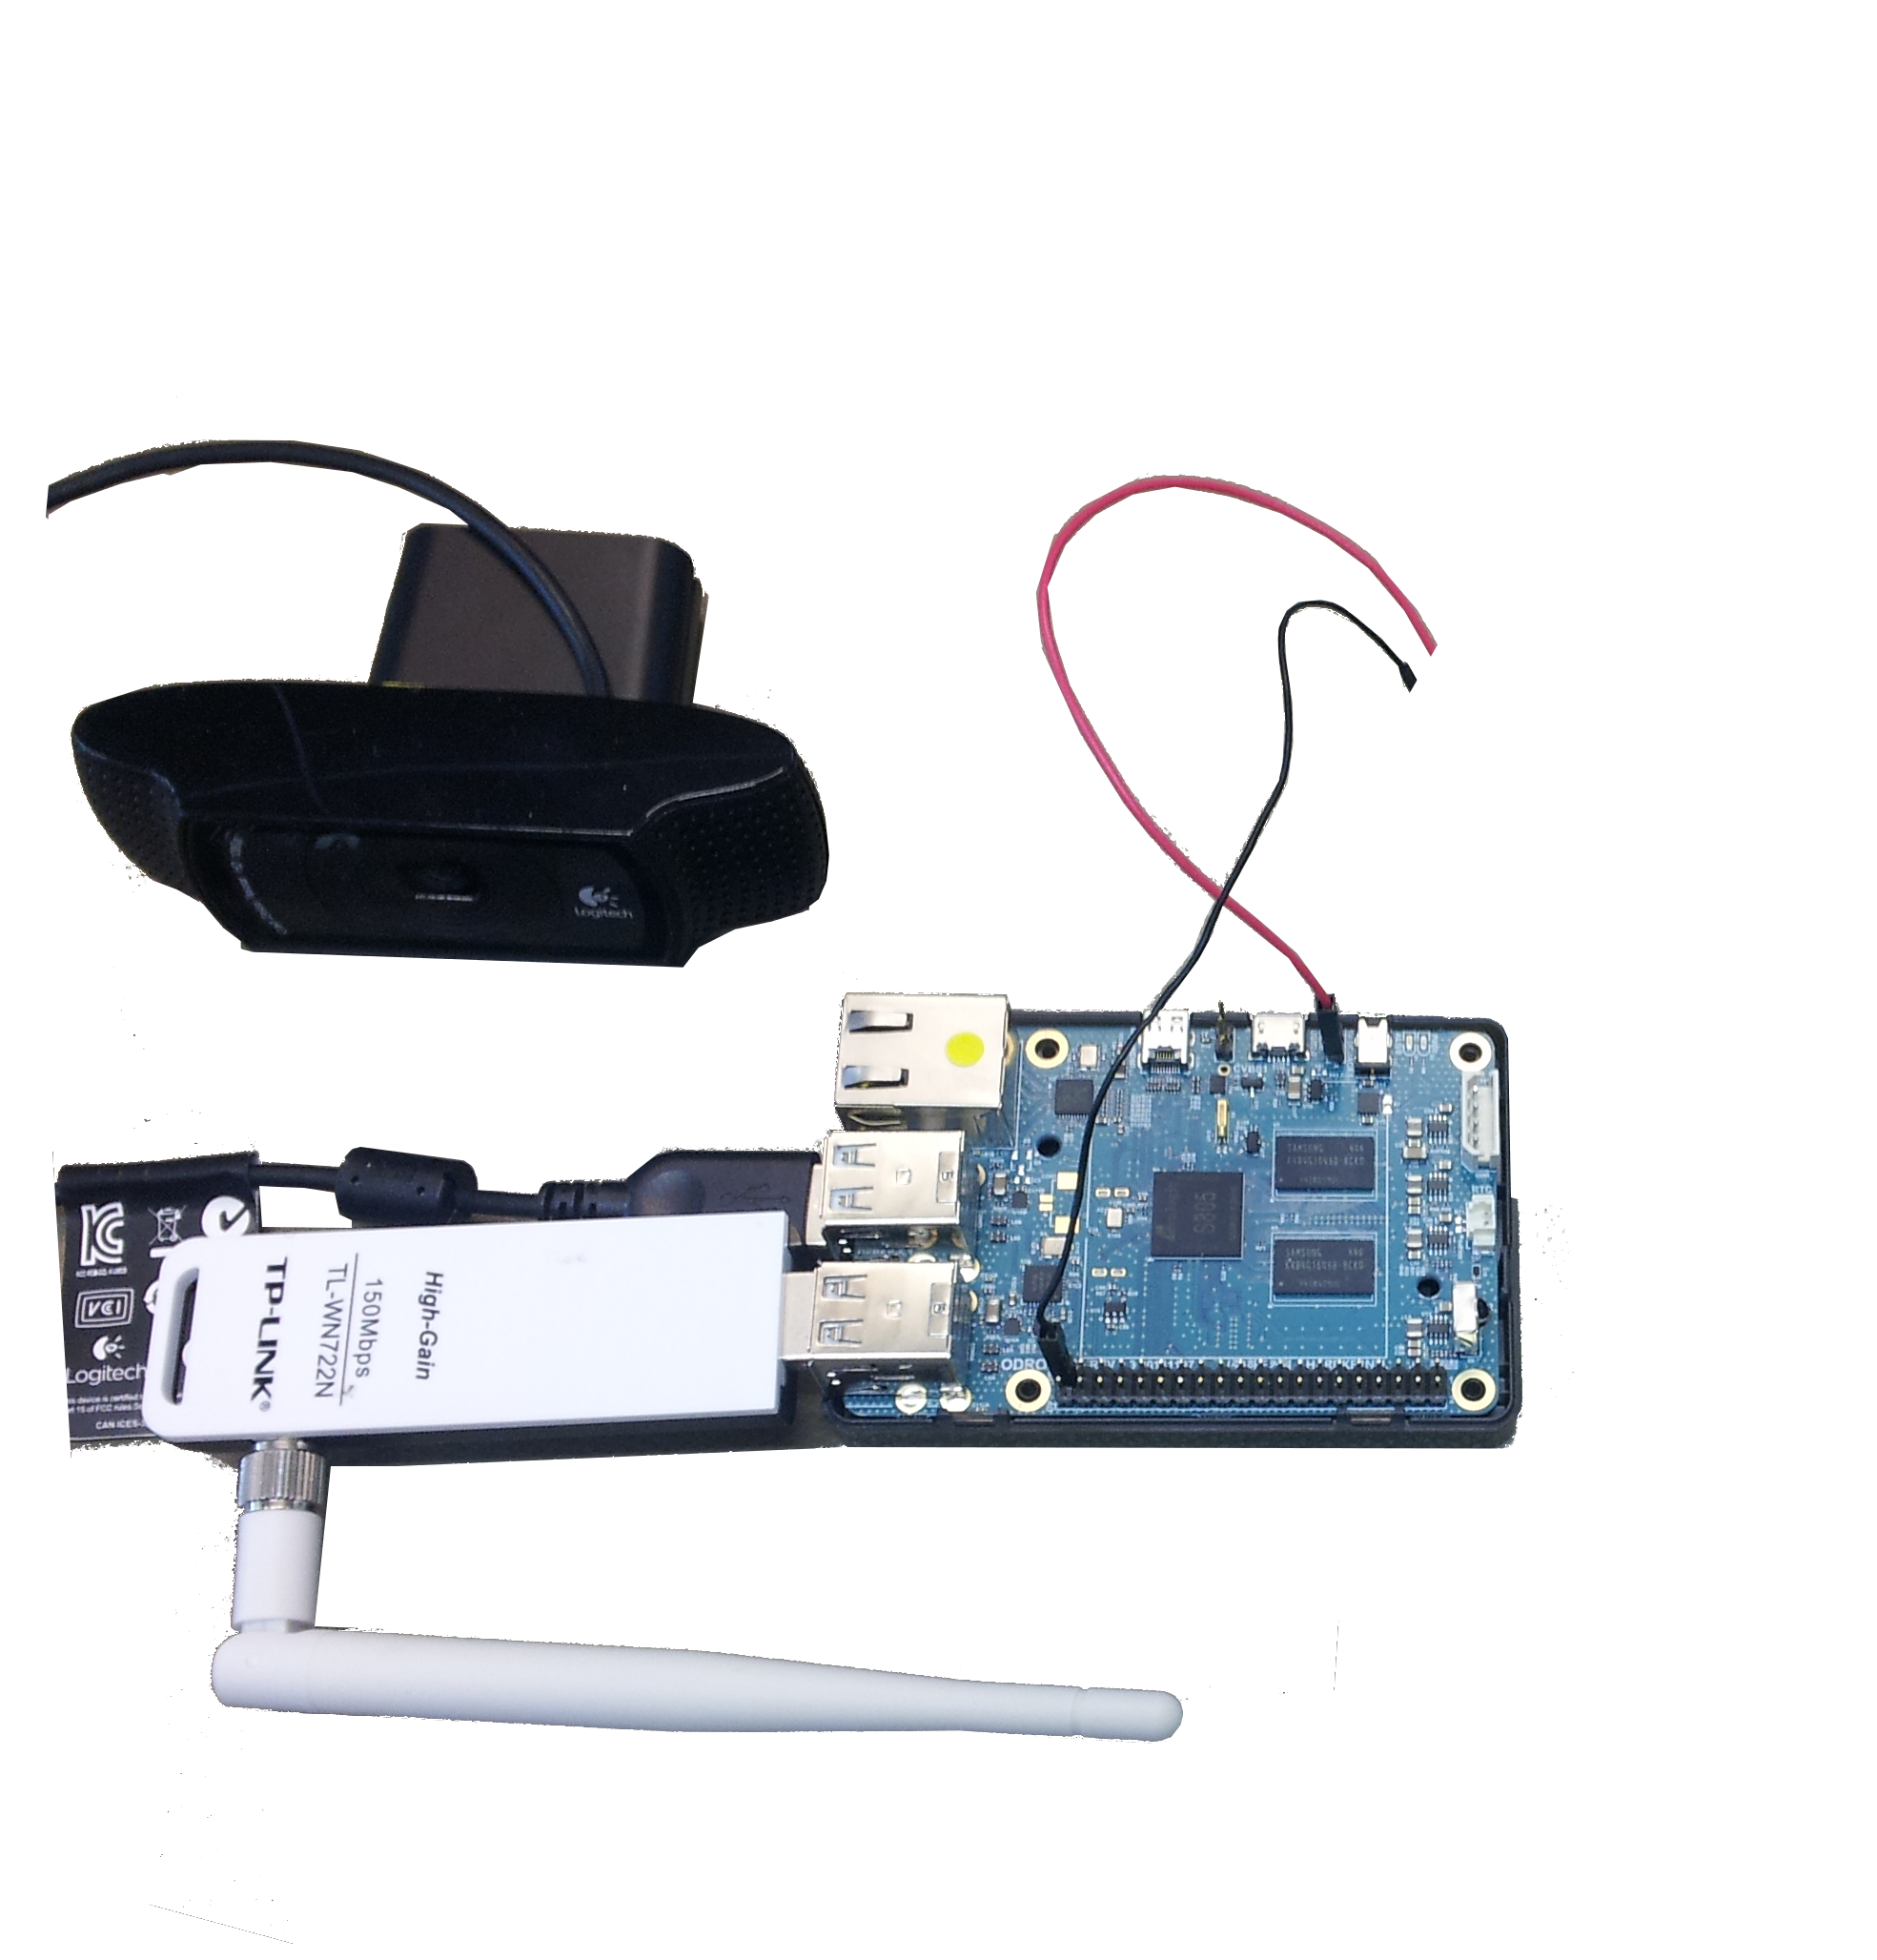
The whole hardware setup is shown in the figure below. It consists of the following parts:
- Odroid C1
- Logitech camera C920
- WiFi module TP-LINK TL-WN722N

Install Linux environment in Odroid C1
To install the Linux environment (Ubuntu 14.04), follow the instruction given in the Odroid C1 tutorial. In this tutorial it is also shown how to access the Odroid C1 with a UART cable and how to establish Ethernet connection.
Set up alternative power connection
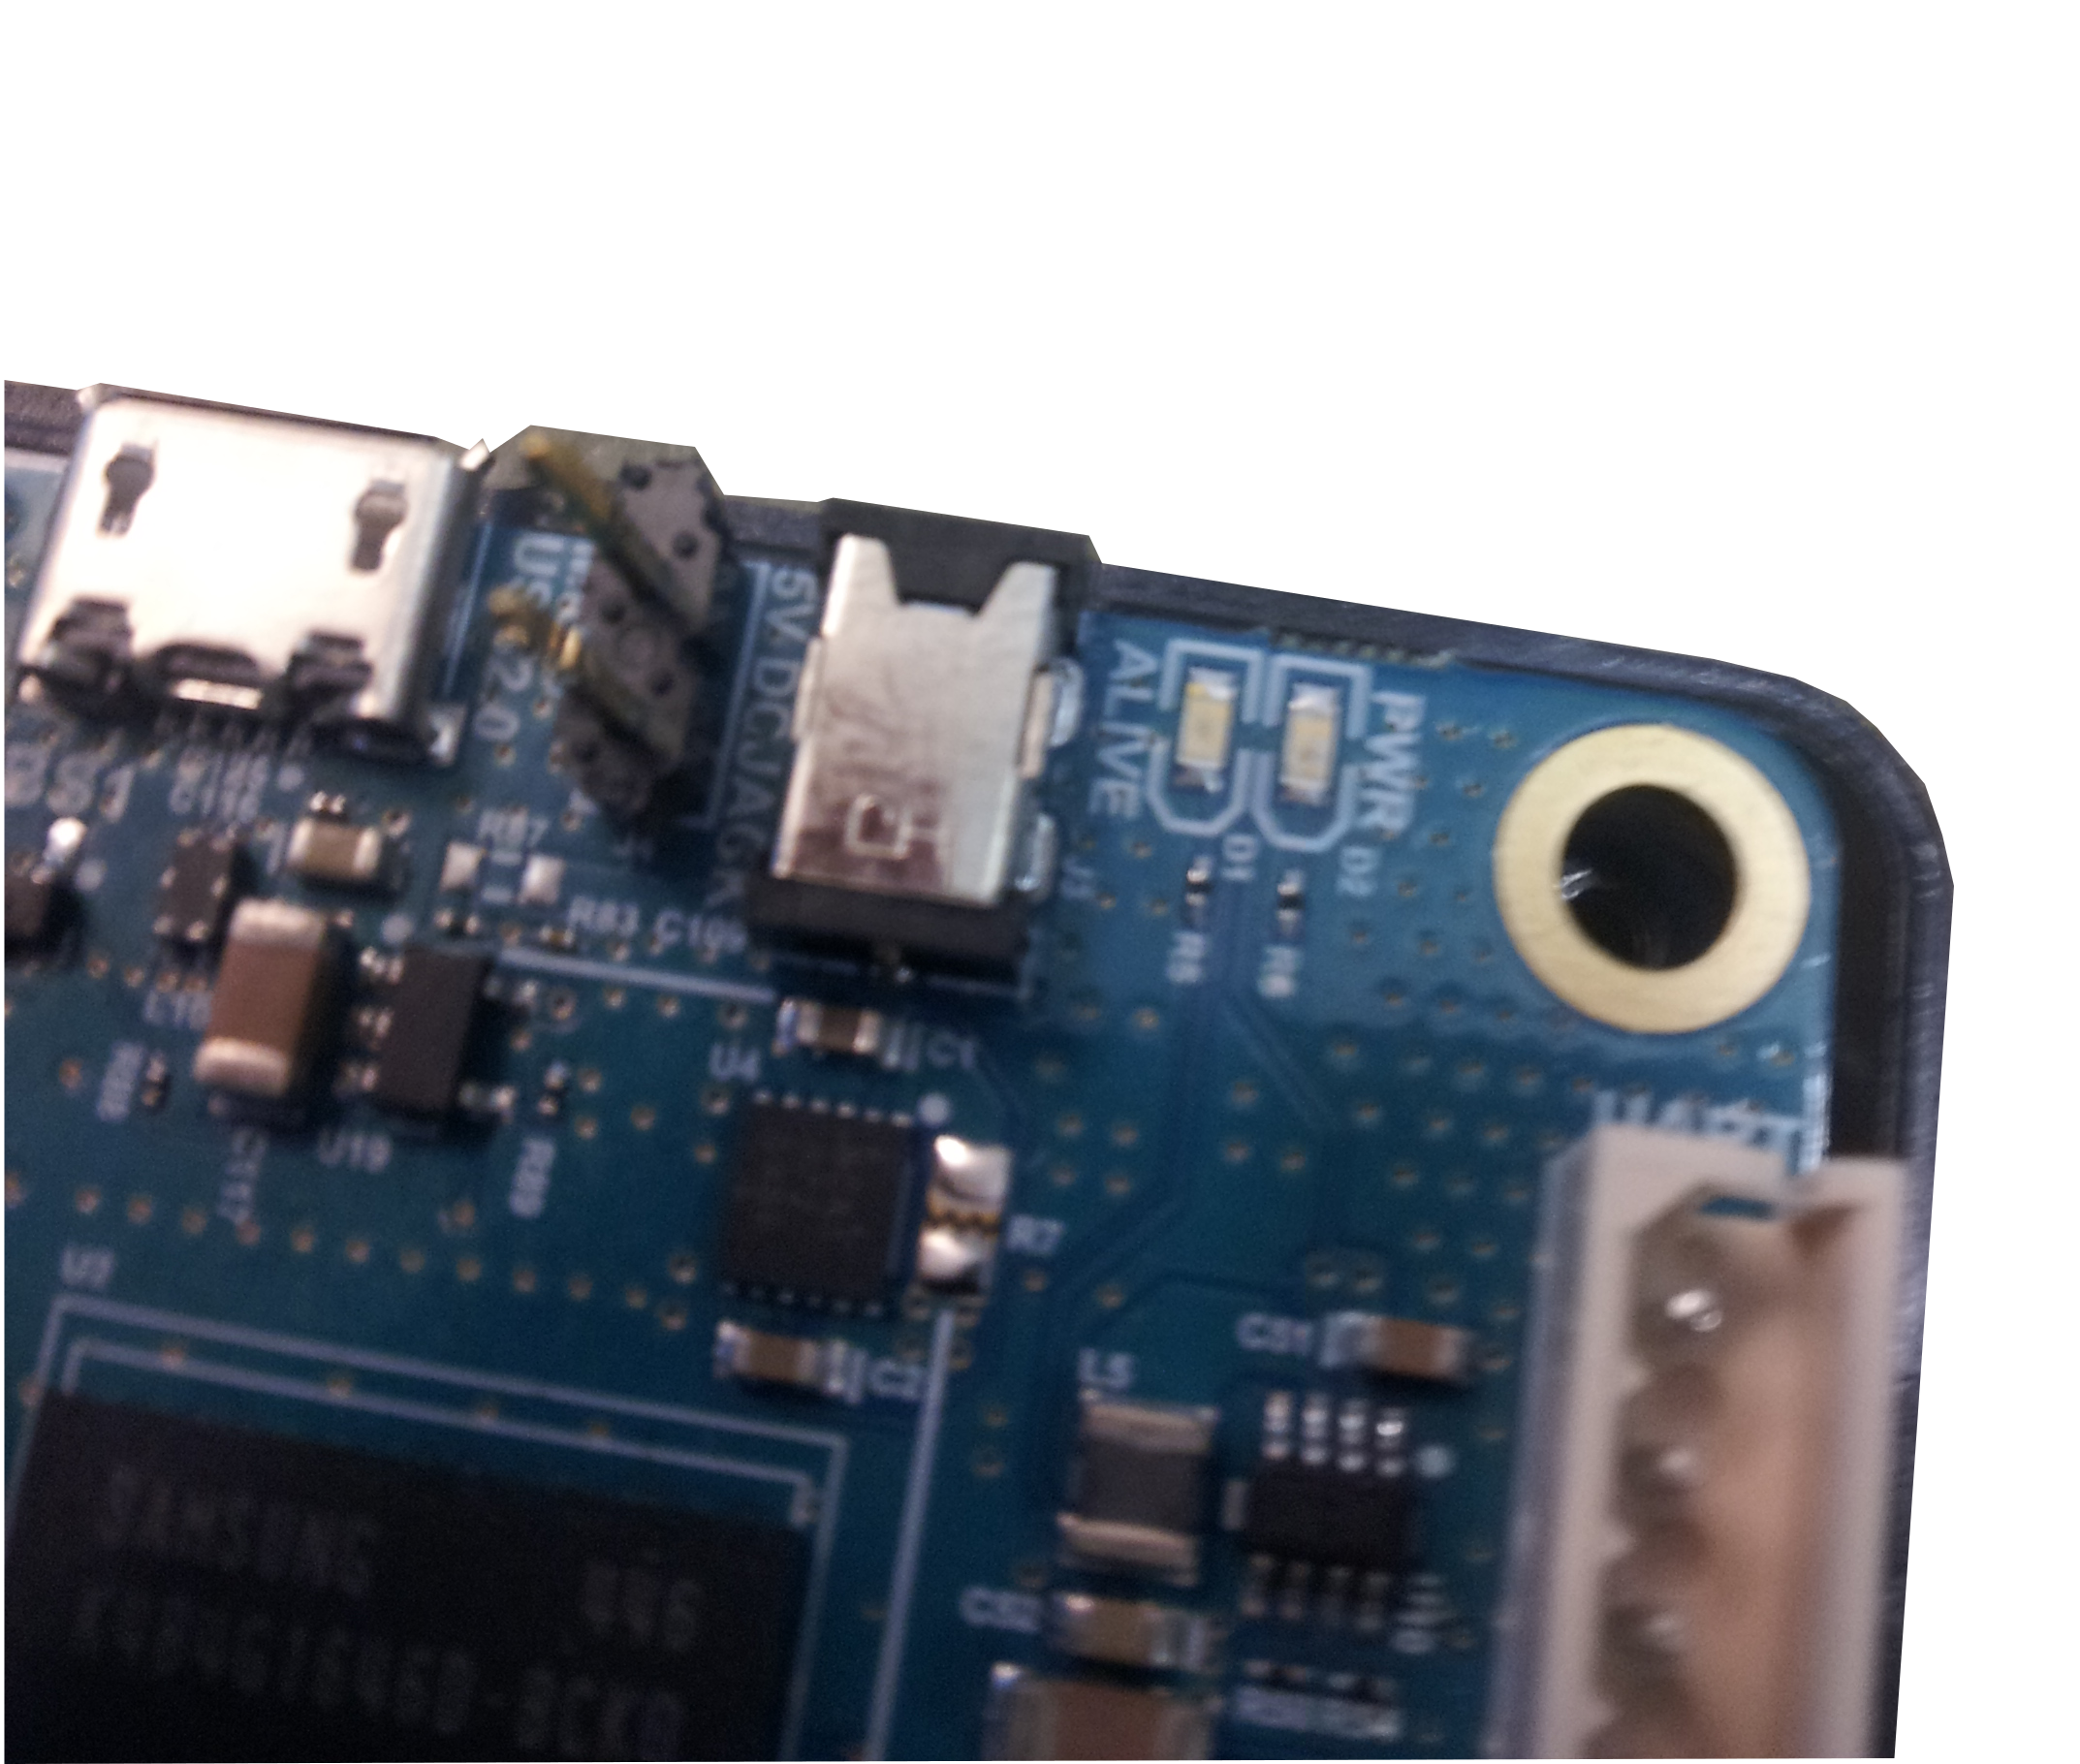
The Odroid C1 can be powered via the 5V DC jack. If the Odroid is mounted on a drone, it is recommended to solder two pins next to the 5V DC jack by applying the through-hole soldering method as shown in the figure below. The power is delivered by connecting the DC voltage source (5 V) via a jumper cable (red in the image above) with the Odroid C1 and connect the ground of the circuit with a jumper cable (black in the image above) with a ground pin of the Odroid C1 in the example setup.

Enable WiFi connection for Odroid C1
In this this tutorial the WiFi module TP-LINK TL-WN722N is used. To enable WiFi connection for the Odroid C1, follow the steps described in the Odroid C1 tutorial in the section Establishing wifi connection with antenna.
Configure as WiFi Access Point
This sections shows how to set up the Odroid C1 such that it is an access point. The content is taken from this tutorial with some small adaptions. To enable to stream the video from the camera via the Odroid C1 to the QGroundControl that runs on a computer it is not required to follow this section. However, it is shown here because setting up the Odroid C1 as an access point allows to use the system in a stand-alone fashion. The TP-LINK TL-WN722N is used as a WiFi module. In the ensuing steps it is assumed that the Odroid C1 assigns the name wlan0 to your WiFi module. Change all occurrences of wlan0 to the appropriate interface if different (e.g. wlan1).
Onboard Computer as Access Point
For a more in depth explanation, you can look at RPI-Wireless-Hotspot
Install the necessary software
sudo apt-get install hostapd udhcpd
Configure DHCP. Edit the file /etc/udhcpd.conf
start 192.168.2.100 # This is the range of IPs that the hostspot will give to client devices.
end 192.168.2.200
interface wlan0 # The device uDHCP listens on.
remaining yes
opt dns 8.8.8.8 4.2.2.2 # The DNS servers client devices will use (if routing through the ethernet link).
opt subnet 255.255.255.0
opt router 192.168.2.1 # The Onboard Computer's IP address on wlan0 which we will set up shortly.
opt lease 864000 # 10 day DHCP lease time in seconds
All other 'opt' entries should be disabled or configured properly if you know what you are doing.
Edit the file /etc/default/udhcpd and change the line:
DHCPD_ENABLED="no"
to
#DHCPD_ENABLED="no"
You will need to give the Onboard Computer a static IP address. Edit the file /etc/network/interfaces and replace the line iface wlan0 inet dhcp (or iface wlan0 inet manual) to:
auto wlan0
iface wlan0 inet static
address 192.168.2.1
netmask 255.255.255.0
network 192.168.2.0
broadcast 192.168.2.255
wireless-power off
Disable the original (WiFi Client) auto configuration. Change the lines (they probably will not be all next to each other or may not even be there at all):
allow-hotplug wlan0
wpa-roam /etc/wpa_supplicant/wpa_supplicant.conf
iface default inet dhcp
to:
#allow-hotplug wlan0
#wpa-roam /etc/wpa_supplicant/wpa_supplicant.conf
#iface default inet dhcp
If you have followed the Odroid C1 tutorial to set up the WiFi connection, you might have created the file /etc/network/intefaces.d/wlan0. Please comment out all lines in that file such that those configurations have no effect anymore.
Configure HostAPD: To create a WPA-secured network, edit the file /etc/hostapd/hostapd.conf (create it if it does not exist) and add the following lines:
auth_algs=1
channel=6            # Channel to use
hw_mode=g
ieee80211n=1          # 802.11n assuming your device supports it
ignore_broadcast_ssid=0
interface=wlan0
wpa=2
wpa_key_mgmt=WPA-PSK
wpa_pairwise=TKIP
rsn_pairwise=CCMP
# Change the to the proper driver
driver=nl80211
# Change these to something else if you want
ssid=OdroidC1
wpa_passphrase=QGroundControl
Change ssid=, channel=, and wpa_passphrase= to values of your choice. SSID is the hotspot's name which is broadcast to other devices, channel is what frequency the hotspot will run on, wpa_passphrase is the password for the wireless network. For many more options see the file /usr/share/doc/hostapd/examples/hostapd.conf.gz.
Look for a channel that is not in use in the area. You can use tools such as wavemon for that.
Edit the file /etc/default/hostapd and change the line:
#DAEMON_CONF=""
to:
DAEMON_CONF="/etc/hostapd/hostapd.conf"
Your Onboard Computer should now be hosting a wireless hotspot. To get the hotspot to start on boot, run these additional commands:
sudo update-rc.d hostapd enable
sudo update-rc.d udhcpd enable
This is enough to have the Onboard Computer present itself as an Access Point and allow your ground station to connect. If you truly want to make it work as a real Access Point (routing the WiFi traffic to the Onboard Computer’s ethernet connection), we need to configure the routing and network address translation (NAT). Enable IP forwarding in the kernel:
sudo sh -c "echo 1 > /proc/sys/net/ipv4/ip_forward"
To enable NAT in the kernel, run the following commands:
sudo iptables -t nat -A POSTROUTING -o eth0 -j MASQUERADE
sudo iptables -A FORWARD -i eth0 -o wlan0 -m state --state RELATED,ESTABLISHED -j ACCEPT
sudo iptables -A FORWARD -i wlan0 -o eth0 -j ACCEPT
To make this permanent, run the following command:
sudo sh -c "iptables-save > /etc/iptables.ipv4.nat"
Now edit the file /etc/network/interfaces and add the following line to the bottom of the file:
up iptables-restore < /etc/iptables.ipv4.nat
gstreamer Installation
To install gstreamer packages on the computer and on the Odroid C1 and start the stream, follow the instruction given in the QGroundControl README.
If you cannnot start the stream on the Odroid with the uvch264s plugin, you can also try to start it with the v4l2src plugin:
gst-launch-1.0 v4l2src device=/dev/video0 ! video/x-h264,width=1920,height=1080,framerate=24/1 ! h264parse ! rtph264pay ! udpsink host=xxx.xxx.xxx.xxx port=5000
Where xxx.xxx.xxx.xxx is the IP address where QGC is running. If you get the system error: Permission denied, you might need to prepend sudo to the command above.
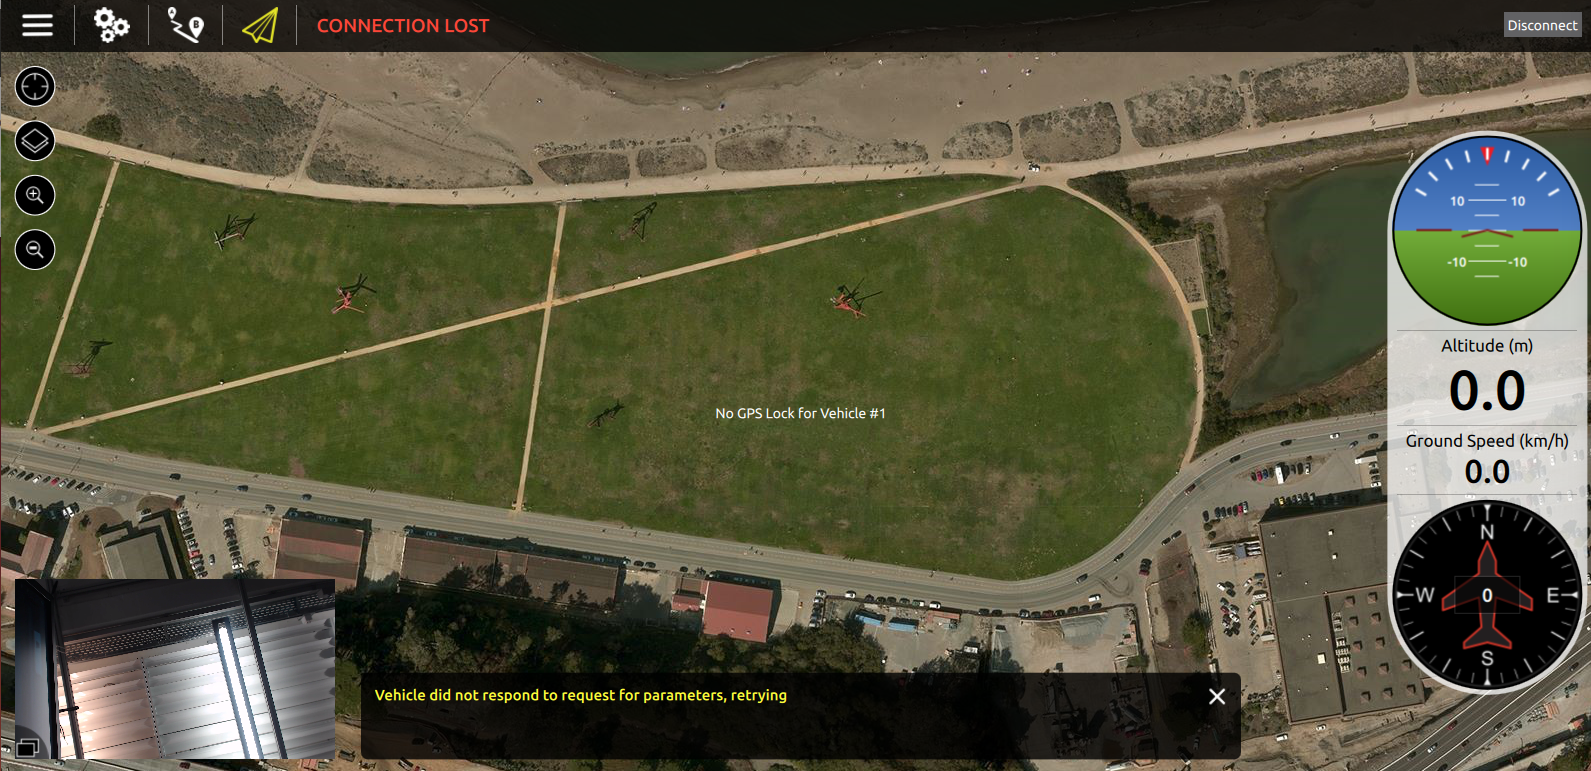
If everything works, you should see the video stream on the bottom left corner in the flight-mode window of QGroundControl as shown in the screeenshot below.

If you click on the video stream, the satellite map is shown in the left bottom cornor and the video is shown in the whole background.